


What is Docker Hub?
Docker Hub is a cloud-based registry service that allows developers to store and share their Docker images. It is a central repository for Docker images and is the easiest way to share your Docker images with the world. In this article, we will discuss how to upload a Docker image to Docker Hub. I will use my own python app that I created in this article.
Step 1: Create a Docker Image
The first step in uploading a Docker image to Docker Hub is to create a Docker image. You can do this by writing a Dockerfile that contains the necessary instructions to build the image. It has its own structure and is really easy to write. If you wanna have a deep dive into the Dockerfile instructions all of them are very good described on official Docker documentation website: https://docs.docker.com/engine/reference/builder/
For my python application I have created following Dockerfile:
FROM python:3.8-slim-buster

WORKDIR /app

COPY requirements.txt .

RUN pip3 install --no-cache-dir -r requirements.txt

COPY . .

CMD ["python3", "app.py"]
Once you have created the Dockerfile, you can build the image by running the following command in your terminal:
$ docker build -t <username>/<repository_name>:<tag> .
Where, <username> is your Docker Hub username, <repository_name> is the name of your repository, and <tag> is the version or tag of your image. The . at the end specifies that the build context is the current directory. In my case I executed following command:
$ docker build -t marcinkujawski/python-api:1.0 .Step 2: Login to Docker Hub
Once you have created the Docker image, you need to log in to Docker Hub using your Docker Hub username and password. You can do this by running the following command:
$ docker login -u <username>You will be prompted for a password. Please provide a Docker Hub token – if you don’t have one, login to Docker Hub and go to Account Settings -> Security -> Access Tokens and generate one.
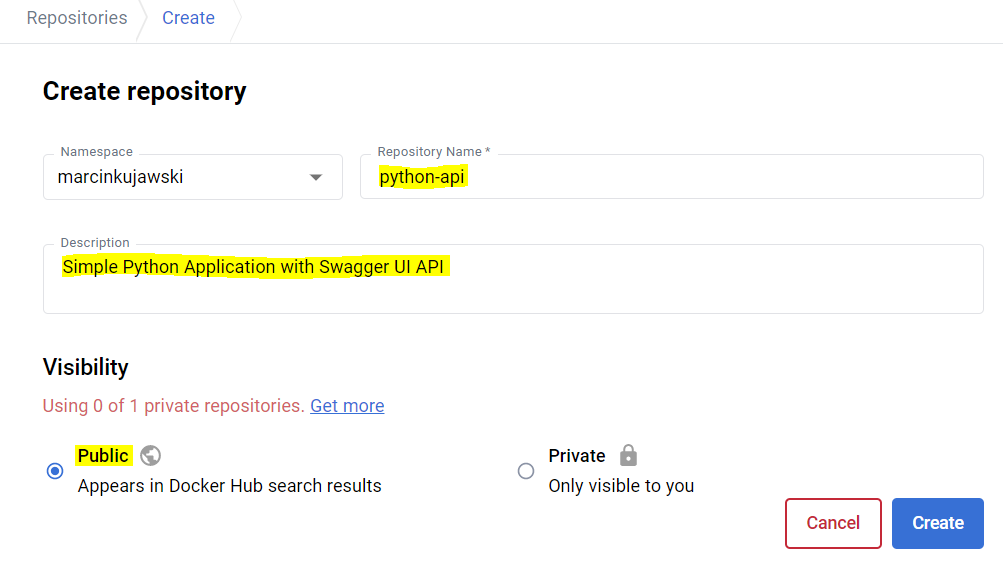
Step 3: Create Repository
Before pushing Docker image into Docker Hub we need to create a repository for our image. Go to the main Docker Hub page and click Create Repository. Fill all the required data as presented below:
- Repository Name: Name of you Docker image.
- Description: Nice to have few words about the image here.
- Visibility: Either Public or Private – you decide. If Public then anybody can pull it and create a docker image, if Private then to pull the image a credentials are required.
Step 4: Tag the Docker Image
After logging in, you need to tag your Docker image with your Docker Hub username and the name of your repository. This is mandatory. You can do this by running the following command:
$ docker tag <image_id> <username>/<repository_name>:<tag>Where, <image_id> is the ID of the Docker image that you created in step 1. In my case it was:
$ docker tag marcinkujawski/python-api:1.0 marcinkujawski/python-api:1.0Step 5: Push the Docker Image
Finally, we can upload the Docker image to Docker Hub by running the following command:
$ docker push <username>/<repository_name>:<tag>This will push the Docker image to Docker Hub and make it publicly available. I have done it by running:
$ docker push marcinkujawski/python-api:1.0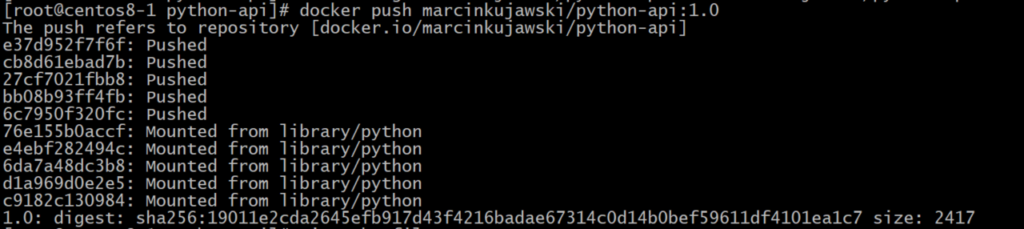
Now we are done with this image which is already available globally.
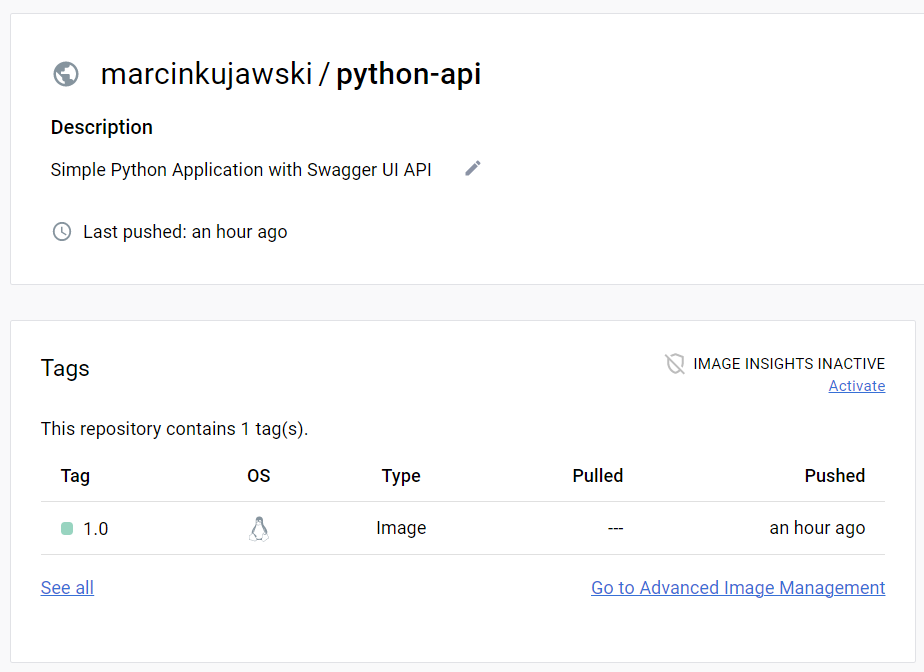
Step 6: Verify Image on Docker Hub
To be 100% sure that we have it pushed with success, login to Docker Hub and verify the image we have pushed is there. In my case all went ok and image is available on Docker Hub with a good tag version.
Step 7: Kubernetes Test (optional)
As a really final step I will create a Kubernetes deployment named python-app, which will run 3 replicas of the container that will test my Docker marcinkujawski/python-api:1.0 image. I’m also exposing port 8080 in the container as by default my application is using it. Here is the content:
# python-app.yaml

apiVersion: apps/v1
kind: Deployment
metadata:
  name: python-app
  labels:
    app: python-app
spec:
  replicas: 3
  selector:
    matchLabels:
      app: python-app
  template:
    metadata:
      labels:
        app: python-app
    spec:
      containers:
      - name: python-app
        image: marcinkujawski/python-api:1.0
        ports:
        - containerPort: 8080
And let’s run it. I will use my Kubernetes cluster to test the app.
$ kubectl apply -f python-app.yaml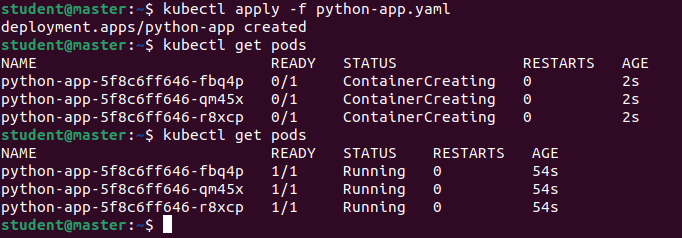
All went fine – deployment was created, of course to test it end-to-end we should reach the application via web browser. As you probably saw I created only simple deployment with no service exposed so we need to grab one of the replicas IP and access it by direct IP address on port 8080.


Test successful. Application is running and Docker image we upload into Docker Hub was properly deployed as a part of Kubernetes deployment.
Conclusion
In this article, we have discussed how to upload a Docker image to Docker Hub. Docker Hub is a great way to store and share your Docker images with the world. By following these simple steps, you can easily upload your Docker image to Docker Hub and share it with other developers or if you decide to keep them private, share it with specific people or use only by yourself.