


Introduction
If you’re running Kubernetes clusters in production, you probably already know about Software Bill of Materials (SBOM) for your applications. But what about the Kubernetes cluster itself? All those control plane components, node binaries, third-party plugins, CRDs, service meshes, and whatnot. Who keeps track of those?
That’s where KBOM comes in. The Kubernetes Bill of Materials is a tool that generates a complete inventory of everything that makes up your Kubernetes cluster. Think of it as an X-ray of your infrastructure that shows you exactly what’s running under the hood.
Why does this matter? Recent CVEs in Kubernetes third-party tooling like Crossplane, Jenkins Kubernetes plugin, or Clusternet showed us that we need better visibility into what’s actually deployed in our clusters. When a new CVE drops, you want to know immediately if you’re affected. KBOM gives you that answer in seconds instead of hours of manual checking.
In this guide I’ll show you how to install KBOM, generate bill of materials for your cluster, and use different output formats. We’ll go through practical examples that you can run in your own environment.
Overview of KBOM
KBOM is an open source CLI tool originally created by KSOC (now maintained by RAD Security) that analyzes your Kubernetes cluster and generates a comprehensive manifest of all components. It’s different from container SBOMs because it focuses on the Kubernetes infrastructure itself, not the applications running on it.
What KBOM Actually Does?
When you run KBOM against your cluster, it collects information about:
- Cluster Metadata – Basic cluster information including Kubernetes version, cloud provider type (AWS, Azure, GCP, or on-prem), cluster creation timestamp, and overall cluster configuration.
- Node Details – For each node in your cluster, KBOM captures hostname, OS version, kernel version, CPU architecture, container runtime version (containerd, CRI-O, Docker), kubelet version, and kube-proxy version.
- Container Images – All images running in your cluster with their full digest hashes. This is useful for tracking down vulnerable images when CVEs are announced.
- Kubernetes Resources – Counts and details of deployed resources like Deployments, DaemonSets, StatefulSets, Services, ConfigMaps, Secrets, and Custom Resource Definitions (CRDs).
- Third-Party Components – Service meshes (Istio, Linkerd), monitoring tools (Prometheus, Grafana), GitOps tools (ArgoCD, Flux), ingress controllers (Nginx, Traefik), and any other add-ons you’ve installed.
How KBOM Works?
KBOM connects to your Kubernetes cluster using your kubeconfig (same way kubectl does) and queries the Kubernetes API to discover all components. It doesn’t require any agents or additional deployments in your cluster. You just run the CLI tool from your workstation or CI/CD pipeline.
The tool generates output in multiple formats:
- JSON – Default format, easy to parse programmatically
- YAML – Human-readable alternative to JSON
- CycloneDX JSON/XML – Industry standard BOM format compatible with security scanning tools
KBOM works with Kubernetes 1.19 and newer, which covers pretty much any cluster you’re running today. It’s been tested with all major cloud providers (EKS, AKS, GKE) and also works with on-prem clusters like RKE2, K3s, or kubeadm installations.
Use Cases for KBOM
- Security Audits – When a new CVE is announced affecting Kubernetes components, you can quickly grep your KBOM files to see if you’re vulnerable. For example, if there’s a CVE in kubelet 1.24.3, you can instantly find all clusters running that version.
- Compliance Requirements – Many compliance frameworks now require maintaining an inventory of infrastructure components. KBOM gives you that documentation automatically.
- Change Management – Generate KBOM before and after cluster upgrades to see exactly what changed. This is especially useful for tracking down issues after updates.
- Cost Optimization – The KBOM includes node types and cloud provider information, which helps you analyze your infrastructure costs and identify opportunities to optimize.
- Onboarding New Team Members – Instead of explaining verbally what’s running in your clusters, just hand them a KBOM file. They can see every component, version, and configuration in one place.
Prerequisites
Before we start generating KBOMs, make sure you have:
- A running Kubernetes cluster (any version from 1.19 onwards). This can be a cloud-managed cluster (EKS, AKS, GKE) or self-hosted (RKE2, K3s, kubeadm).
kubectlinstalled and configured with access to your cluster. Verify withkubectl get nodes.- Sufficient RBAC permissions to read cluster resources. You need at least read access to nodes, pods, deployments, services, and CRDs. Cluster-admin is easiest but not strictly required.
- Homebrew installed (for macOS/Linux installation) or access to download binaries directly from GitHub releases.
If you’re planning to integrate KBOM into CI/CD pipelines, you’ll also want a service account with appropriate permissions and a way to store the generated KBOM files (S3 bucket, artifact repository, etc.).
1️⃣ Installing KBOM
Let me show you different ways to install KBOM depending on your operating system and preferences.
✅ Step 1: Installing via Homebrew (Recommended for macOS/Linux)
The easiest way to install KBOM is through Homebrew. This works on both macOS and Linux systems.
First, add the KBOM tap to Homebrew:
$ brew tap rad-security/homebrew-kbomThen install KBOM:
$ brew install kbomVerify the installation:
$ kbom version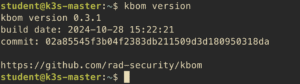
✅ Step 2: Installing from GitHub Releases (Alternative Method)
If you don’t use Homebrew or prefer to download binaries directly, you can grab them from the GitHub releases page.
Go to https://github.com/rad-security/kbom/releases and download the binary for your operating system and architecture. For example, on Linux AMD64:
$ wget https://github.com/rad-security/kbom/releases/download/v0.3.0/kbom-linux-amd64
$ chmod +x kbom-linux-amd64
$ sudo mv kbom-linux-amd64 /usr/local/bin/kbom
Verify it works:
$ kbom version2️⃣ Generating Your First KBOM
Now that KBOM is installed, let’s generate a bill of materials for your cluster.
✅ Step 1: Verify Cluster Access
Before generating a KBOM, make sure kubectl is configured correctly and can access your cluster:
$ kubectl cluster-info
$ kubectl get nodes
If these commands work, KBOM will be able to access your cluster too since it uses the same kubeconfig.
✅ Step 2: Generate KBOM with Default Settings (JSON Output)
The simplest way to generate a KBOM is with no additional flags. This outputs JSON to stdout:
$ kbom generateYou’ll see JSON output that starts something like this:
{
  "id": "8e797d10-7dc2-469f-8815-96cad5a074d2",
  "bom_format": "rad",
  "spec_version": "0.3",
  "generated_at": "2025-11-11T14:45:39.369102629+01:00",
  "generated_by": {
    "vendor": "RAD Security",
    "name": "kbom",
    "build_time": "2024-10-28 15:22:21",
    "version": "0.3.1",
    "commit": "02a85545f3b04f2383db211509d3d180950318da",
    "commit_time": "2024-10-28 16:20:33"
  },
  "cluster": {
    "name": "default",
    "ca_cert_digest": "63b2d49dc1b90a05017f7fb29308f242c5f742223fb3745ac50202a28dafa141",
    "k8s_version": "1.33.5",
    "location": {
      "name": "unknown",
      "region": "",
      "zone": ""
    },
    "nodes_count": 1,
    "nodes": [
      {
        "name": "k3s-master",
        "type": "k3s",
        "hostname": "k3s-master",
        "capacity": {
          "cpu": "8",
          "memory": "16376204Ki",
          "pods": "110",
          "ephemeral_storage": "38905184Ki"
        },
        "allocatable": {
          "cpu": "8",
          "memory": "16376204Ki",
          "pods": "110",
          "ephemeral_storage": "37846962966"
        }
...
The full output can be quite large (thousands of lines for production clusters), so you probably want to save it to a file instead.
✅ Step 3: Save KBOM to a File
To save the KBOM to a file instead of printing to stdout:
$ kbom generate --output=file --out-path=/tmpThis creates a file named kbom.json in the /tmp directory. The filename includes a timestamp by default to prevent overwriting previous KBOMs:
$ ls -lah /tmp/kbom*.json
-rw-rw-r-- 1 student student 194K Nov 11 14:46 /tmp/kbom-63b2d49d-2025-11-11-14-45-39.json
You can specify a custom output directory:
$ kbom generate --output=file --out-path=./kbom-reports✅ Step 4: Generate Short KBOM (Quick Overview)
Sometimes you don’t need the full detailed report. The --short flag generates a condensed version that includes only metadata, nodes, images, and resource counts:
$ kbom generate --shortThis produces much smaller output (typically around 600 lines instead of 10,000+). The short version is useful for:
- Quick cluster overview
- CI/CD pipelines where you want faster execution
- Comparing clusters at a high level
- Generating daily snapshots without eating up storage
Here’s what a short KBOM looks like:
{
  "id": "c98e6b47-f2f3-4e47-b427-47a635a7a388",
  "bom_format": "rad",
  "spec_version": "0.3",
  "generated_at": "2025-11-11T14:48:25.702883423+01:00",
  "generated_by": {
    "vendor": "RAD Security",
    "name": "kbom",
    "build_time": "2024-10-28 15:22:21",
    "version": "0.3.1",
    "commit": "02a85545f3b04f2383db211509d3d180950318da",
    "commit_time": "2024-10-28 16:20:33"
  },
  "cluster": {
    "name": "default",
    "ca_cert_digest": "63b2d49dc1b90a05017f7fb29308f242c5f742223fb3745ac50202a28dafa141",
    "k8s_version": "1.33.5",
    "location": {
      "name": "unknown",
      "region": "",
      "zone": ""
    },
    "nodes_count": 1,
    "nodes": [
      {
        "name": "k3s-master",
        "type": "k3s",
        "hostname": "k3s-master",
        "capacity": {
          "cpu": "8",
          "memory": "16376204Ki",
          "pods": "110",
          "ephemeral_storage": "38905184Ki"
        },
        "allocatable": {
          "cpu": "8",
          "memory": "16376204Ki",
          "pods": "110",
          "ephemeral_storage": "37846962966"
        },
        "labels": null,
        "annotations": null,
        "machine_id": "263e4d14edf649b18548a786b6fcfa25",
        "architecture": "amd64",
        "container_runtime_version": "containerd://2.1.4-k3s1",
        "boot_id": "477f0a51-14d3-43af-bb91-d1dddf8fe8e0",
        "kernel_version": "6.14.0-33-generic",
        "kube_proxy_version": "",
        "kubelet_version": "v1.33.5+k3s1",
        "operating_system": "linux",
        "os_image": "Ubuntu 24.04.3 LTS"
      }
    ],
    "components": {
      "images": [
        {
          "full_name": "registry.k8s.io/ingress-nginx/kube-webhook-certgen:v20230312-helm-chart-4.5.2-28-g66a760794@sha256:01d181618f270f2a96c04006f33b2699ad3ccb02da48d0f89b22abce084b292f",
          "name": "registry.k8s.io/ingress-nginx/kube-webhook-certgen",
          "version": "v20230312-helm-chart-4.5.2-28-g66a760794",
          "digest": "sha256:01d181618f270f2a96c04006f33b2699ad3ccb02da48d0f89b22abce084b292f"
        },
        {
          "full_name": "quay.io/jetstack/cert-manager-controller:v1.19.1",
          "name": "quay.io/jetstack/cert-manager-controller",
          "version": "v1.19.1",
          "digest": "sha256:cd49e769e18ada1fd7b9a9bacc87c90db24c65cbfd4bf71694dda7ed40e91187"
        },
        {
          "full_name": "xpkg.crossplane.io/crossplane/crossplane:v2.0.2",
          "name": "xpkg.crossplane.io/crossplane/crossplane",
          "version": "v2.0.2",
          "digest": "sha256:8ce925cbe716ad2f0bdb36bccd51e466e679e39c31b1c8bf8b635afeefcff21b"
        },
        {
          "full_name": "phpipam/phpipam-cron:1.5x",
          "name": "docker.io/phpipam/phpipam-cron",
          "version": "1.5x",
          "digest": "sha256:169b59c55f45c586fe95a8613eb827f23083d6b85485e3f4a64a9645f05cabc5"
        },
        {
          "full_name": "public.ecr.aws/docker/library/redis:8.2.2-alpine",
          "name": "public.ecr.aws/docker/library/redis",
          "version": "8.2.2-alpine",
          "digest": "sha256:59b6e694653476de2c992937ebe1c64182af4728e54bb49e9b7a6c26614d8933"
        },
        {
          "full_name": "rancher/mirrored-cluster-api-controller:v1.10.2",
          "name": "docker.io/rancher/mirrored-cluster-api-controller",
          "version": "v1.10.2",
          "digest": "sha256:f9b6e51a8f5a6fc68dc02d8bd3d2aca39305823bf4c670689bcd835a4035612a"
        },
        {
          "full_name": "quay.io/jetstack/cert-manager-cainjector:v1.19.1",
          "name": "quay.io/jetstack/cert-manager-cainjector",
          "version": "v1.19.1",
          "digest": "sha256:c7898aece8fb08102fca0b37683e37cb94e0a77c0d15b8e3c9128f6c04c868e0"
        },
        {
          "full_name": "rancher/rancher:v2.12.3",
          "name": "docker.io/rancher/rancher",
          "version": "v2.12.3",
          "digest": "sha256:5a26e0918b425bd91e9be0678e39d7be08f3f023de42622008894aad7db10080"
     },
# All components goes here
...
3️⃣ Working with Different Output Formats
KBOM supports multiple output formats to integrate with different tools and workflows.
✅ Step 1: Generate KBOM in YAML Format
If you prefer YAML over JSON (easier to read and diff), use the --format flag:
$ kbom generate --format=yaml --output=file --out-path=.This creates a YAML file that looks like this:
id: 98272847-049a-4501-9ed4-37b262195212
bomformat: rad
specversion: "0.3"
generatedat: 2025-11-11T14:51:13.328524335+01:00
generatedby:
  vendor: RAD Security
  name: kbom
  buildtime: "2024-10-28 15:22:21"
  version: 0.3.1
  commit: 02a85545f3b04f2383db211509d3d180950318da
  committime: "2024-10-28 16:20:33"
cluster:
  name: default
  cacertdigest: 63b2d49dc1b90a05017f7fb29308f242c5f742223fb3745ac50202a28dafa141
  k8sversion: 1.33.5
  cniversion: ""
  location:
    name: unknown
    region: ""
    zone: ""
  nodescount: 1
  nodes:
    - name: k3s-master
      type: k3s
      hostname: k3s-master
      capacity:
        cpu: "8"
        memory: 16376204Ki
        pods: "110"
        ephemeralstorage: 38905184Ki
      allocatable:
        cpu: "8"
        memory: 16376204Ki
        pods: "110"
        ephemeralstorage: "37846962966"
      labels:
        beta.kubernetes.io/arch: amd64
        beta.kubernetes.io/instance-type: k3s
        beta.kubernetes.io/os: linux
        kubernetes.io/arch: amd64
        kubernetes.io/hostname: k3s-master
        kubernetes.io/os: linux
        node-role.kubernetes.io/control-plane: "true"
        node-role.kubernetes.io/master: "true"
        node.kubernetes.io/instance-type: k3s
      annotations:
        alpha.kubernetes.io/provided-node-ip: 192.168.1.170
        flannel.alpha.coreos.com/backend-data: '{"VNI":1,"VtepMAC":"1a:e3:bc:d9:ab:2f"}'
        flannel.alpha.coreos.com/backend-type: vxlan
        flannel.alpha.coreos.com/kube-subnet-manager: "true"
        flannel.alpha.coreos.com/public-ip: 192.168.1.170
        k3s.io/hostname: k3s-master
        k3s.io/internal-ip: 192.168.1.170
        k3s.io/node-args: '["server","--server","https://192.168.1.170","--bind-address","192.168.1.170","--write-kubeconfig-mode","644","--disable","traefik","--node-name","k3s-master"]'
        k3s.io/node-config-hash: WB22RMBPCSOT4YXPSFEPCCYME3UCZZWPAJKGW6IWSPYXDKMJ532A====
        k3s.io/node-env: '{}'
        management.cattle.io/pod-limits: '{"cpu":"1100m","memory":"2218Mi"}'
        management.cattle.io/pod-requests: '{"cpu":"1","ephemeral-storage":"1000Mi","memory":"1510Mi","pods":"35"}'
        node.alpha.kubernetes.io/ttl: "0"
...
YAML format is great for committing to Git repositories since it’s more readable in pull requests and diffs are cleaner.
✅ Step 2: Generate CycloneDX JSON Format (Industry Standard)
CycloneDX is a widely used standard for bill of materials. Many security scanning tools can import CycloneDX files directly. To generate KBOM in CycloneDX JSON format:
$ kbom generate --format=cyclonedx-json --output=file --out-path=.This produces a file compatible with tools like:
- Dependency-Track for vulnerability management
- OWASP tools for security analysis
- Supply chain security platforms
- Compliance reporting systems
The CycloneDX format includes additional metadata fields that security tools expect:
{
  "$schema": "http://cyclonedx.org/schema/bom-1.5.schema.json",
  "bomFormat": "CycloneDX",
  "specVersion": "1.5",
  "serialNumber": "urn:uuid:31c65a77-5268-44df-9657-58bacf5b1857",
  "version": 1,
  "metadata": {
    "timestamp": "2025-11-11T14:53:33+01:00",
    "tools": [
      {
        "vendor": "RAD Security",
        "name": "kbom",
        "version": "0.3.1"
      }
    ],
    "component": {
      "bom-ref": "pkg:k8s/k8s.io%2Fkubernetes@1.33.5",
      "type": "platform",
      "name": "k8s.io/kubernetes",
      "version": "1.33.5",
      "properties": [
        {
          "name": "cdx:k8s:component:type",
          "value": "cluster"
        },
        {
          "name": "cdx:k8s:component:name",
          "value": "default"
        },
        {
          "name": "rad:kbom:k8s:cluster:nodes",
          "value": "1"
        }
      ]
    }
  },
  "components": [
    # Here goes all components details
  ]
}
✅ Step 3: Generate CycloneDX XML Format
Some older tools prefer XML over JSON. KBOM supports that too:
$ kbom generate --format=cyclonedx-xml --output=file --out-path=.This creates an XML file with the same information as the CycloneDX JSON format. Use this if your vulnerability scanner or compliance tool specifically requires XML input.
✅ Step 4: Combining Format Options
You can combine different flags to get exactly what you need. For example, to generate a short KBOM in YAML format and save it to a specific directory:
$ kbom generate --short --format=yaml --output=file --out-path=/var/kbom-reportsOr to generate a full CycloneDX JSON report:
$ kbom generate --format=cyclonedx-json --output=file --out-path=/var/kbom-reports4️⃣ Analyzing KBOM Output
Once you have a KBOM file, you’ll want to actually use it. Let me show you some practical ways to analyze the data.
✅ Step 1: Searching for Specific Components
Let’s say there’s a CVE announced for kubelet version 1.33.5. You can quickly check if your cluster is affected:
$ cat kbom.json | jq '.components[] | select(.properties[]? | select(.name == "rad:kbom:k8s:node:kubeletVersion" and (.value | contains("1.33.5")))) | .name'This uses jq to filter the JSON and show only nodes running the vulnerable version. If the output is empty, you’re not affected. For a simpler search across all node properties:
$ cat kbom.json | jq -r '.components[] | select(.type == "platform") | .properties[] | select(.name == "rad:kbom:k8s:node:kubeletVersion") | .value'You can search for specific container images too. For example, finding all rancher images:
$ cat kbom.json | jq -r '.components[] | select(.type == "container" and (.name | contains("rancher"))) | "\(.name) - \(.version)"'
This shows all rancher images with their exact digest hashes, so you can verify which version you’re running. To get just the image names:
$ cat kbom.json | jq -r '.components[] | select(.type == "container") | .name' | grep rancher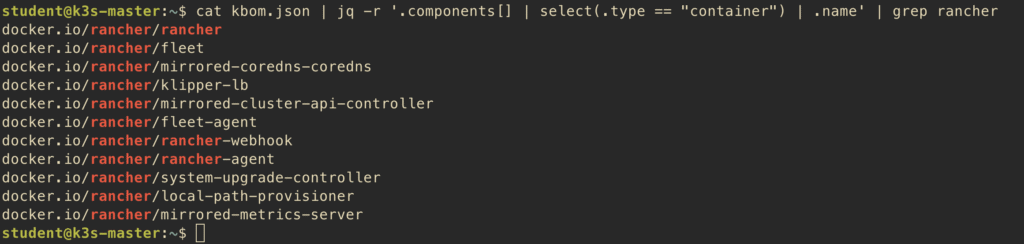
✅ Step 2: Counting Resources
To get a quick overview of your cluster components, you can count different types:
$ cat kbom.json | jq '.components | group_by(.type) | map({type: .[0].type, count: length})'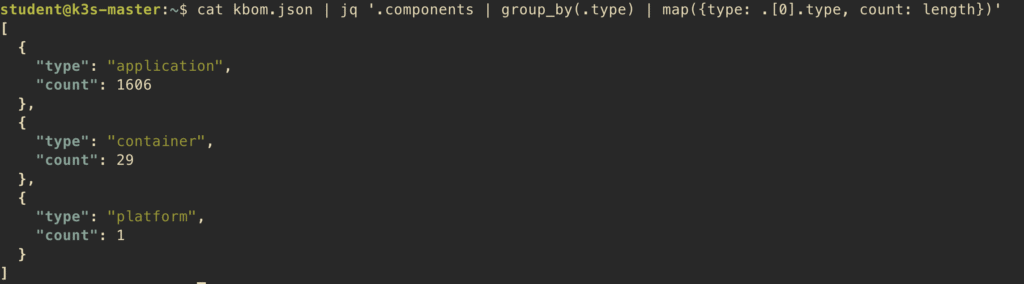
This shows how many components of each type (platform, container) you have. To see all container images:
$ cat kbom.json | jq -r '.components[] | select(.type == "container") | .name'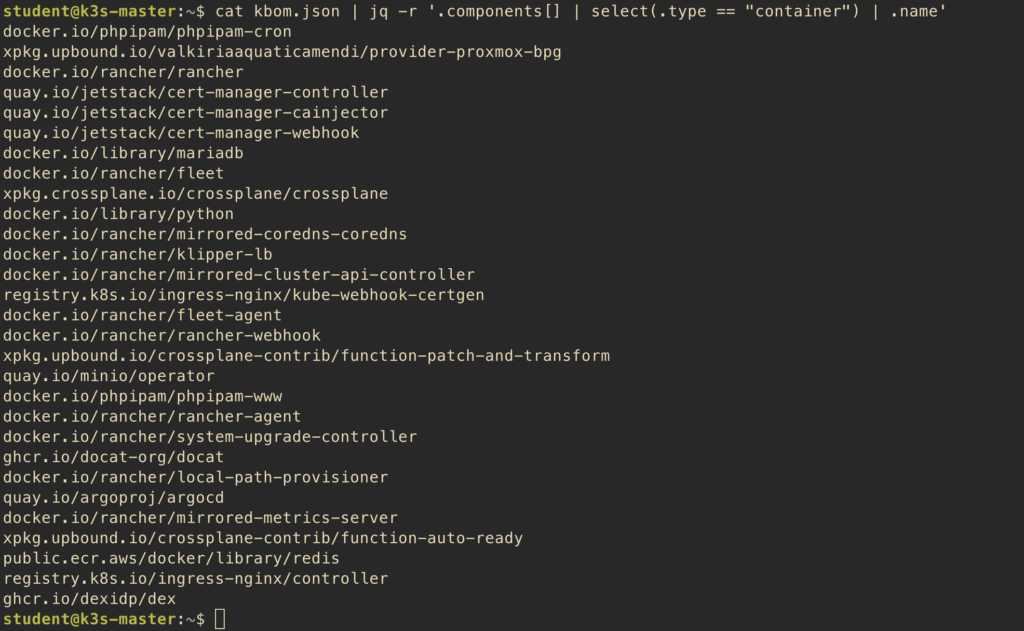
Or count just the containers:
$ cat kbom.json | jq '[.components[] | select(.type == "container")] | length'
✅ Step 3: Finding Node and Container Information
To see detailed information about your nodes:
$ cat kbom.json | jq -r '.components[] | select(.type == "platform") | .properties[] | select(.name | startswith("rad:kbom:k8s:node:")) | "\(.name): \(.value)"'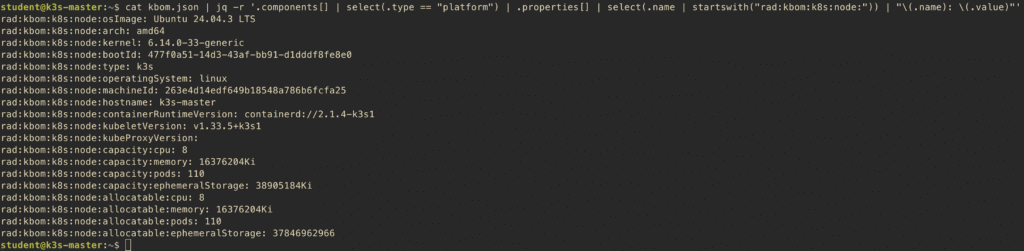
To list all unique container images with their repositories:
$ cat kbom.json | jq -r '.components[] | select(.type == "container") | .name' | sort -u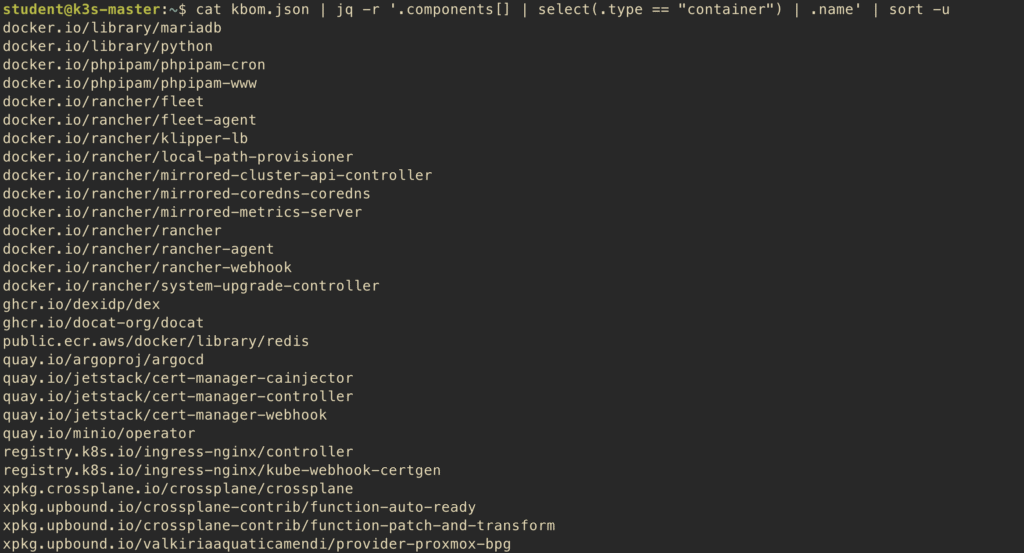
You can also extract specific information like container runtime versions from all nodes:
$ cat kbom.json | jq -r '.components[] | select(.type == "platform") | .properties[] | select(.name == "rad:kbom:k8s:node:containerRuntimeVersion") | .value'
This helps you quickly identify if all nodes are running the same container runtime version or if there’s drift in your infrastructure.
✅ Step 4: Practical Analysis Examples
Here are some real commands you can run against your KBOM file:
Get cluster Kubernetes version:
$ cat kbom.json | jq -r '.metadata.component.version'List all nodes with their OS and kernel:
$ cat kbom.json | jq -r '.components[] | select(.type == "platform") | {node: .name, os: (.properties[] | select(.name == "rad:kbom:k8s:node:osImage") | .value), kernel: (.properties[] | select(.name == "rad:kbom:k8s:node:kernel") | .value)}'Find all images from a specific registry:
$ cat kbom.json | jq -r '.components[] | select(.type == "container" and (.name | startswith("docker.io"))) | .name'Check node capacity (CPU and memory):
$ cat kbom.json | jq -r '.components[] | select(.type == "platform") | {node: .name, cpu: (.properties[] | select(.name == "rad:kbom:k8s:node:capacity:cpu") | .value), memory: (.properties[] | select(.name == "rad:kbom:k8s:node:capacity:memory") | .value)}'List all unique image tags:
$ cat kbom.json | jq -r '.components[] | select(.type == "container") | .properties[] | select(.name == "rad:kbom:pkg:version") | .value' | sort -uThese commands give you quick insights without needing to manually parse through thousands of lines of JSON.
5️⃣ Real-World Use Cases and Best Practices
Let me share some practical scenarios where KBOM has proven useful.
✅ Step 1: Responding to CVE Announcements
When a new CVE drops for a Kubernetes component, you need to know immediately if you’re affected. Here’s the workflow:
- A CVE is announced for containerd 1.6.15
- You generate a fresh KBOM or check your latest stored KBOM
- Search for the affected version:
$ cat kbom.json | jq -r '.components[] | select(.type == "platform") | .properties[] | select(.name == "rad:kbom:k8s:node:containerRuntimeVersion" and (.value | contains("2.1.4-k3s1"))) | .value'If you get results, you can then find which nodes are affected:
$ cat kbom.json | jq -r '.components[] | select(.type == "platform") | select(.properties[]? | select(.name == "rad:kbom:k8s:node:containerRuntimeVersion" and (.value | contains("2.1.4-k3s1")))) | .name'- If nodes are found, you know exactly which nodes need patching
- Use the KBOM to generate a patching plan prioritizing critical nodes first
For container image CVEs, you can search similarly:
$ cat kbom.json | jq -r '.components[] | select(.type == "container" and (.name | contains("rancher"))) | "\(.name): \(.version)"'This whole process takes minutes instead of hours of manual checking across multiple clusters.
✅ Step 2: Cluster Upgrade Planning
Before upgrading Kubernetes, generate a pre-upgrade KBOM:
$ kbom generate --format=yaml --output=file --out-path=./pre-upgrade-kbomAfter the upgrade, generate a post-upgrade KBOM:
$ kbom generate --format=yaml --output=file --out-path=./post-upgrade-kbomDiff them to see exactly what changed:
$ diff -u pre-upgrade-kbom/kbom.yaml post-upgrade-kbom/kbom.yamlThis helps you catch unexpected changes and verify that the upgrade went as planned. You can also use this to create upgrade runbooks showing what versions you’re moving from and to.
✅ Step 3: Security Compliance Audits
Many compliance frameworks (SOC 2, ISO 27001, PCI-DSS) require maintaining an inventory of infrastructure components. KBOM provides this automatically in a format auditors can understand.
Generate a comprehensive KBOM in CycloneDX format for your compliance package:
$ kbom generate --format=cyclonedx-json --output=file --out-path=./compliance-reportsThe CycloneDX format is recognized by most compliance tools and includes metadata that auditors look for like component versions, update timestamps, and dependency relationships.
6️⃣ Quick Reference – Useful jq Commands
Here’s a cheat sheet of the most useful commands for analyzing KBOM files. Save this for quick access:
Cluster information:
# Get Kubernetes version
$ cat kbom.json | jq -r '.metadata.component.version'

# Get cluster name
$ cat kbom.json | jq -r '.metadata.component.properties[] | select(.name == "cdx:k8s:component:name") | .value'

# Get total node count
$ cat kbom.json | jq -r '.metadata.component.properties[] | select(.name == "rad:kbom:k8s:cluster:nodes") | .value'
Node information:
# List all nodes
$ cat kbom.json | jq -r '.components[] | select(.type == "platform") | .name'

# Get kubelet versions for all nodes
$ cat kbom.json | jq -r '.components[] | select(.type == "platform") | .properties[] | select(.name == "rad:kbom:k8s:node:kubeletVersion") | .value' | sort -u

# Get container runtime versions
$ cat kbom.json | jq -r '.components[] | select(.type == "platform") | .properties[] | select(.name == "rad:kbom:k8s:node:containerRuntimeVersion") | .value' | sort -u

# Get OS versions
$ cat kbom.json | jq -r '.components[] | select(.type == "platform") | .properties[] | select(.name == "rad:kbom:k8s:node:osImage") | .value' | sort -u
Container images:
# List all container images
$ cat kbom.json | jq -r '.components[] | select(.type == "container") | .name' | sort

# Count total containers
$ cat kbom.json | jq '[.components[] | select(.type == "container")] | length'

# Find images from specific registry
$ cat kbom.json | jq -r '.components[] | select(.type == "container" and (.name | startswith("docker.io"))) | .name'

# Get image with version and digest
$ cat kbom.json | jq -r '.components[] | select(.type == "container") | "\(.name):\(.properties[] | select(.name == "rad:kbom:pkg:version") | .value) (\(.properties[] | select(.name == "rad:kbom:pkg:digest") | .value))"'
Security checks:
# Check for specific kubelet version
$ cat kbom.json | jq -r '.components[] | select(.type == "platform") | .properties[] | select(.name == "rad:kbom:k8s:node:kubeletVersion" and (.value | contains("1.24.3"))) | .value'

# Find all unique image versions
$ cat kbom.json | jq -r '.components[] | select(.type == "container") | .properties[] | select(.name == "rad:kbom:pkg:version") | .value' | sort -u

# Search for specific container image
$ cat kbom.json | jq -r '.components[] | select(.type == "container" and (.name | contains("rancher"))) | "\(.name): \(.version)"'
Conclusion
KBOM is one of those tools that seems simple on the surface but becomes incredibly valuable once you start using it regularly. It gives you X-ray vision into your Kubernetes infrastructure, showing you exactly what components are running, what versions they’re on, and how everything fits together.
The biggest advantage is speed when responding to security issues. When a new CVE drops, you can check all your clusters in minutes instead of spending hours digging through configurations. For teams managing multiple clusters across different environments, KBOM provides that single source of truth you’ve been missing.
Start by generating KBOMs manually for your clusters to get familiar with the output. Then integrate it into your CI/CD pipelines for automated tracking. Store the KBOMs in version control so you have a historical record of cluster changes over time. The tool is actively maintained by RAD Security and supports all major Kubernetes distributions and cloud providers. Give it a try in your environment and see how much clearer your infrastructure visibility becomes.